Windows Terminal
The purpose of this page is to outline the manual steps to setup my Windows Terminal.
Install Terminal
Navigate to one of the follow downloads to install the Terminal app.
- Download from the Windows Store App
- If you don't have access to the Microsoft Store, builds are also published on the GitHub releases page. However keep in mind that Windows Terminal will not automatically update with new versions.
- Use my preferred way "winget" to install terminal by running the following:
winget install -e --id Microsoft.WindowsTerminalSimply follow the prompts to easily install terminal in its default location.
Install PowerShell Core
Install Powershell Core also using "winget"
winget install -e --id Microsoft.PowerShellDownload the following fonts from nerdfonts.com
Set the basics
- Open the settingbgfs by clicking the down carrot and then select "Settings" from the menu:
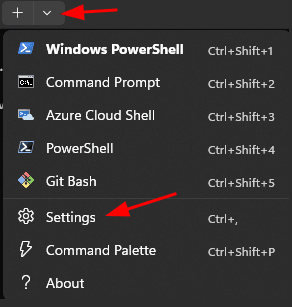
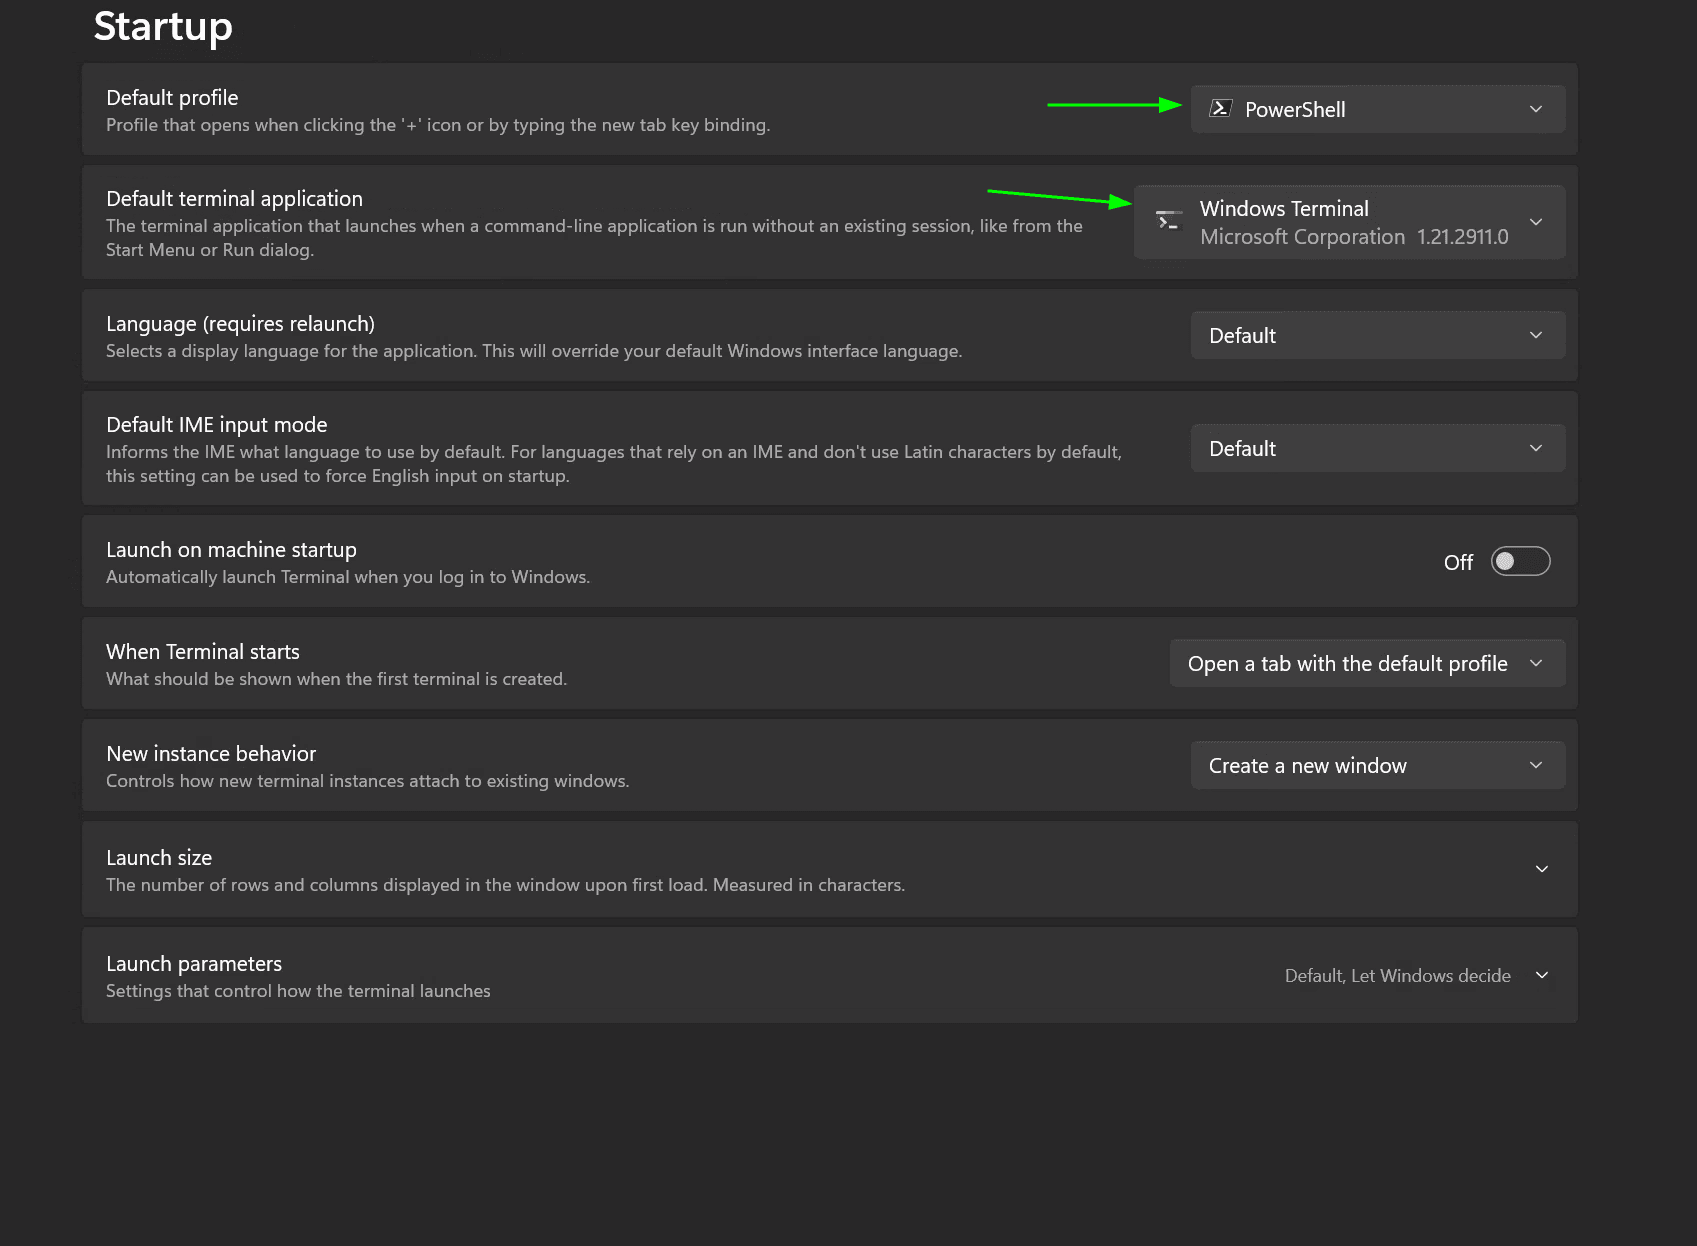
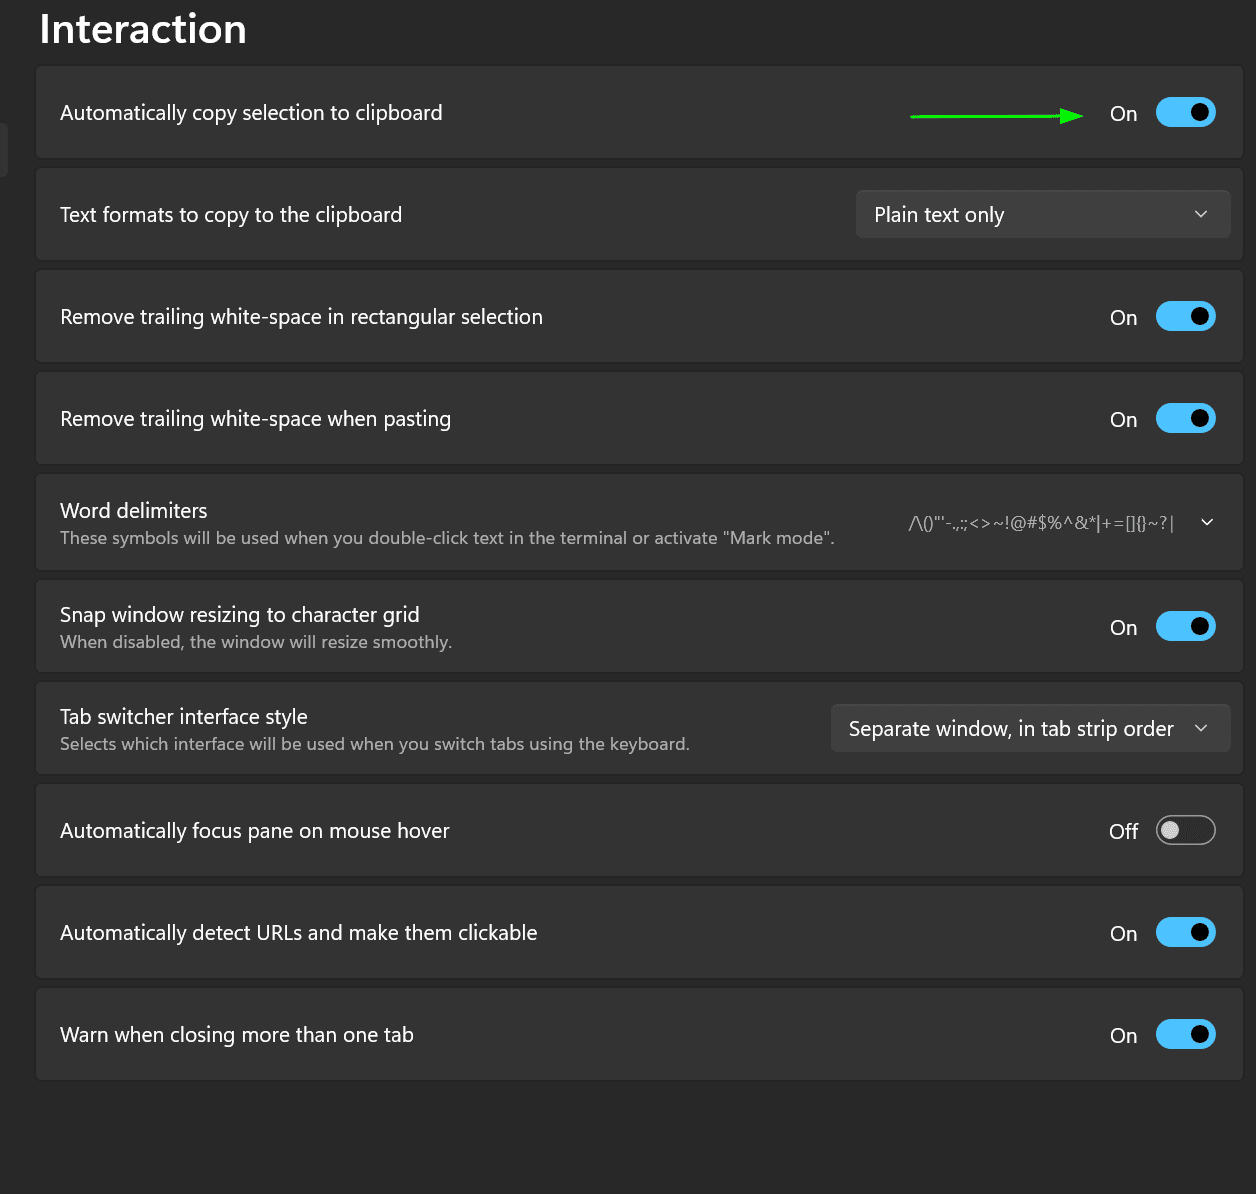
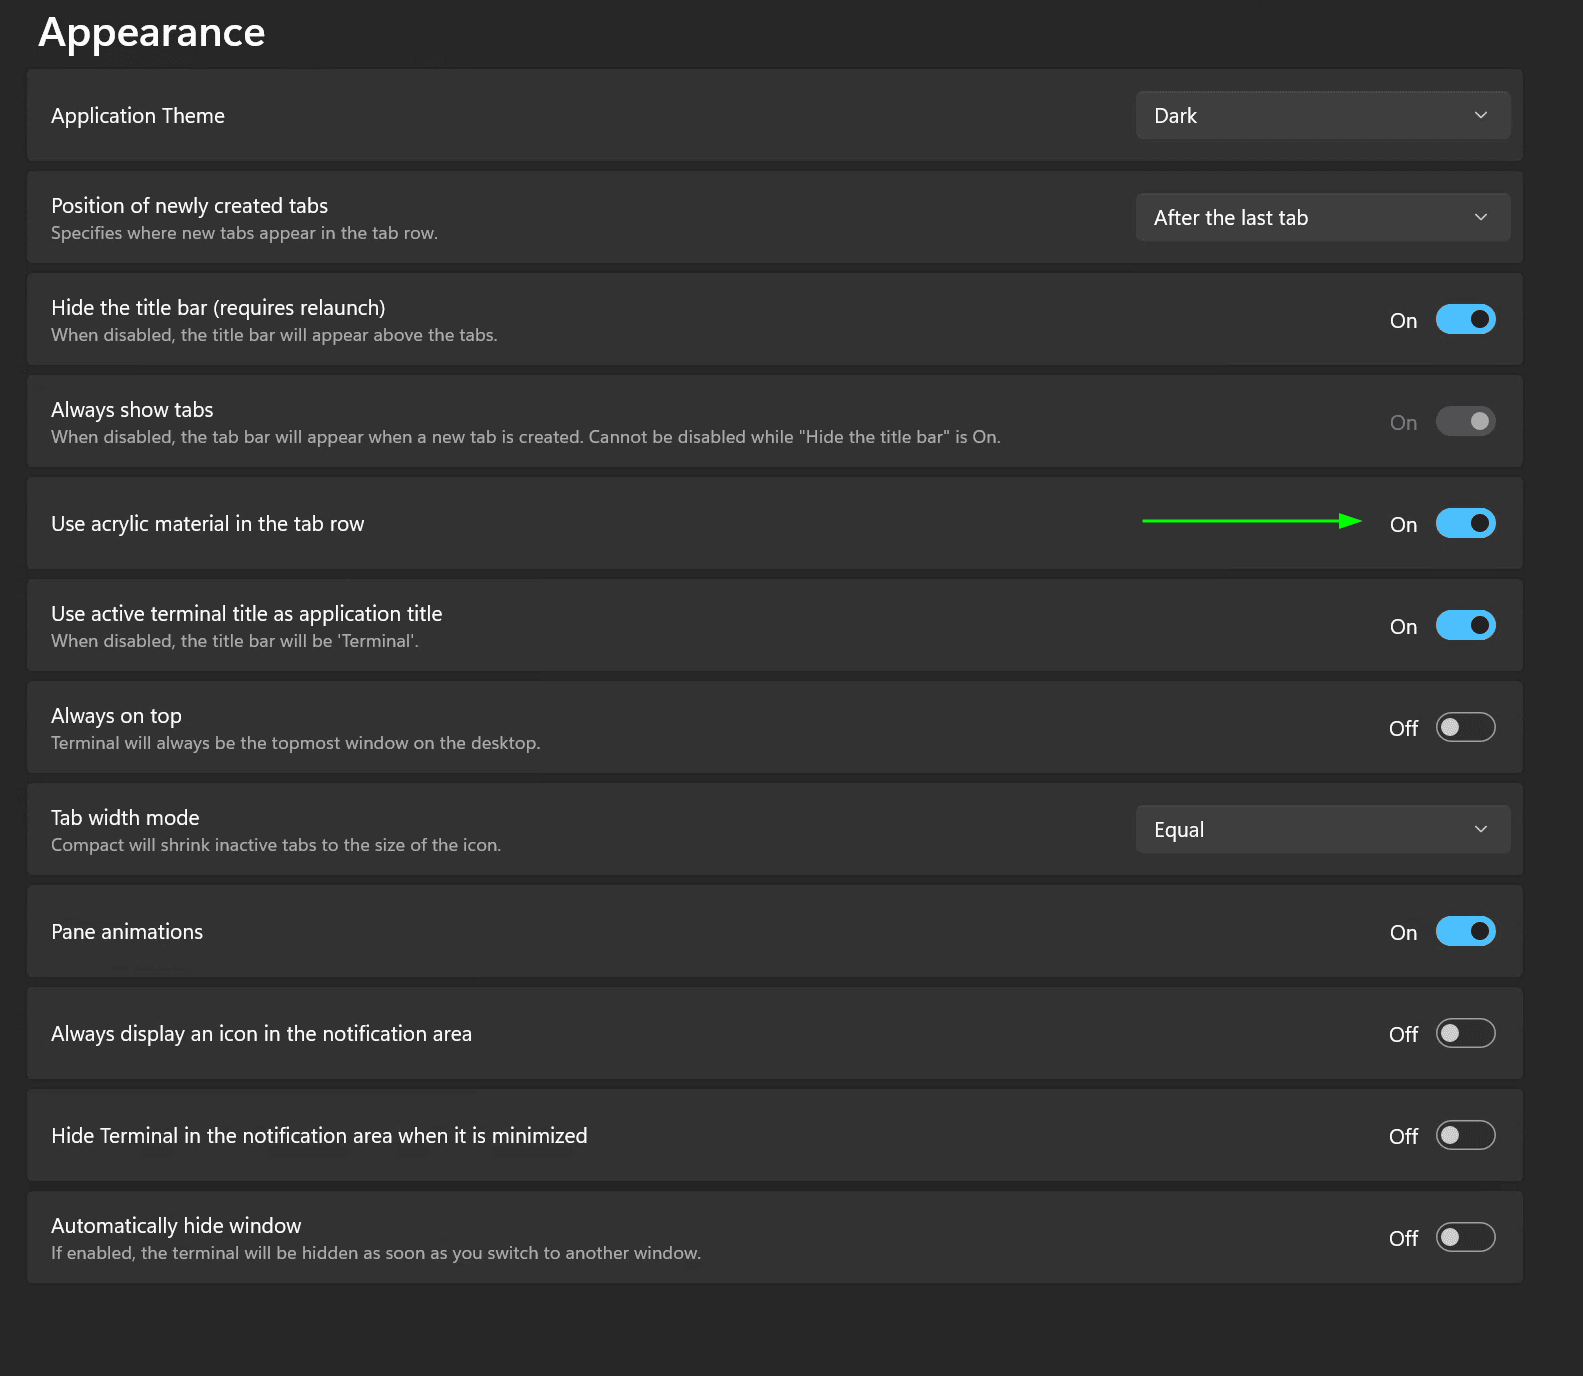
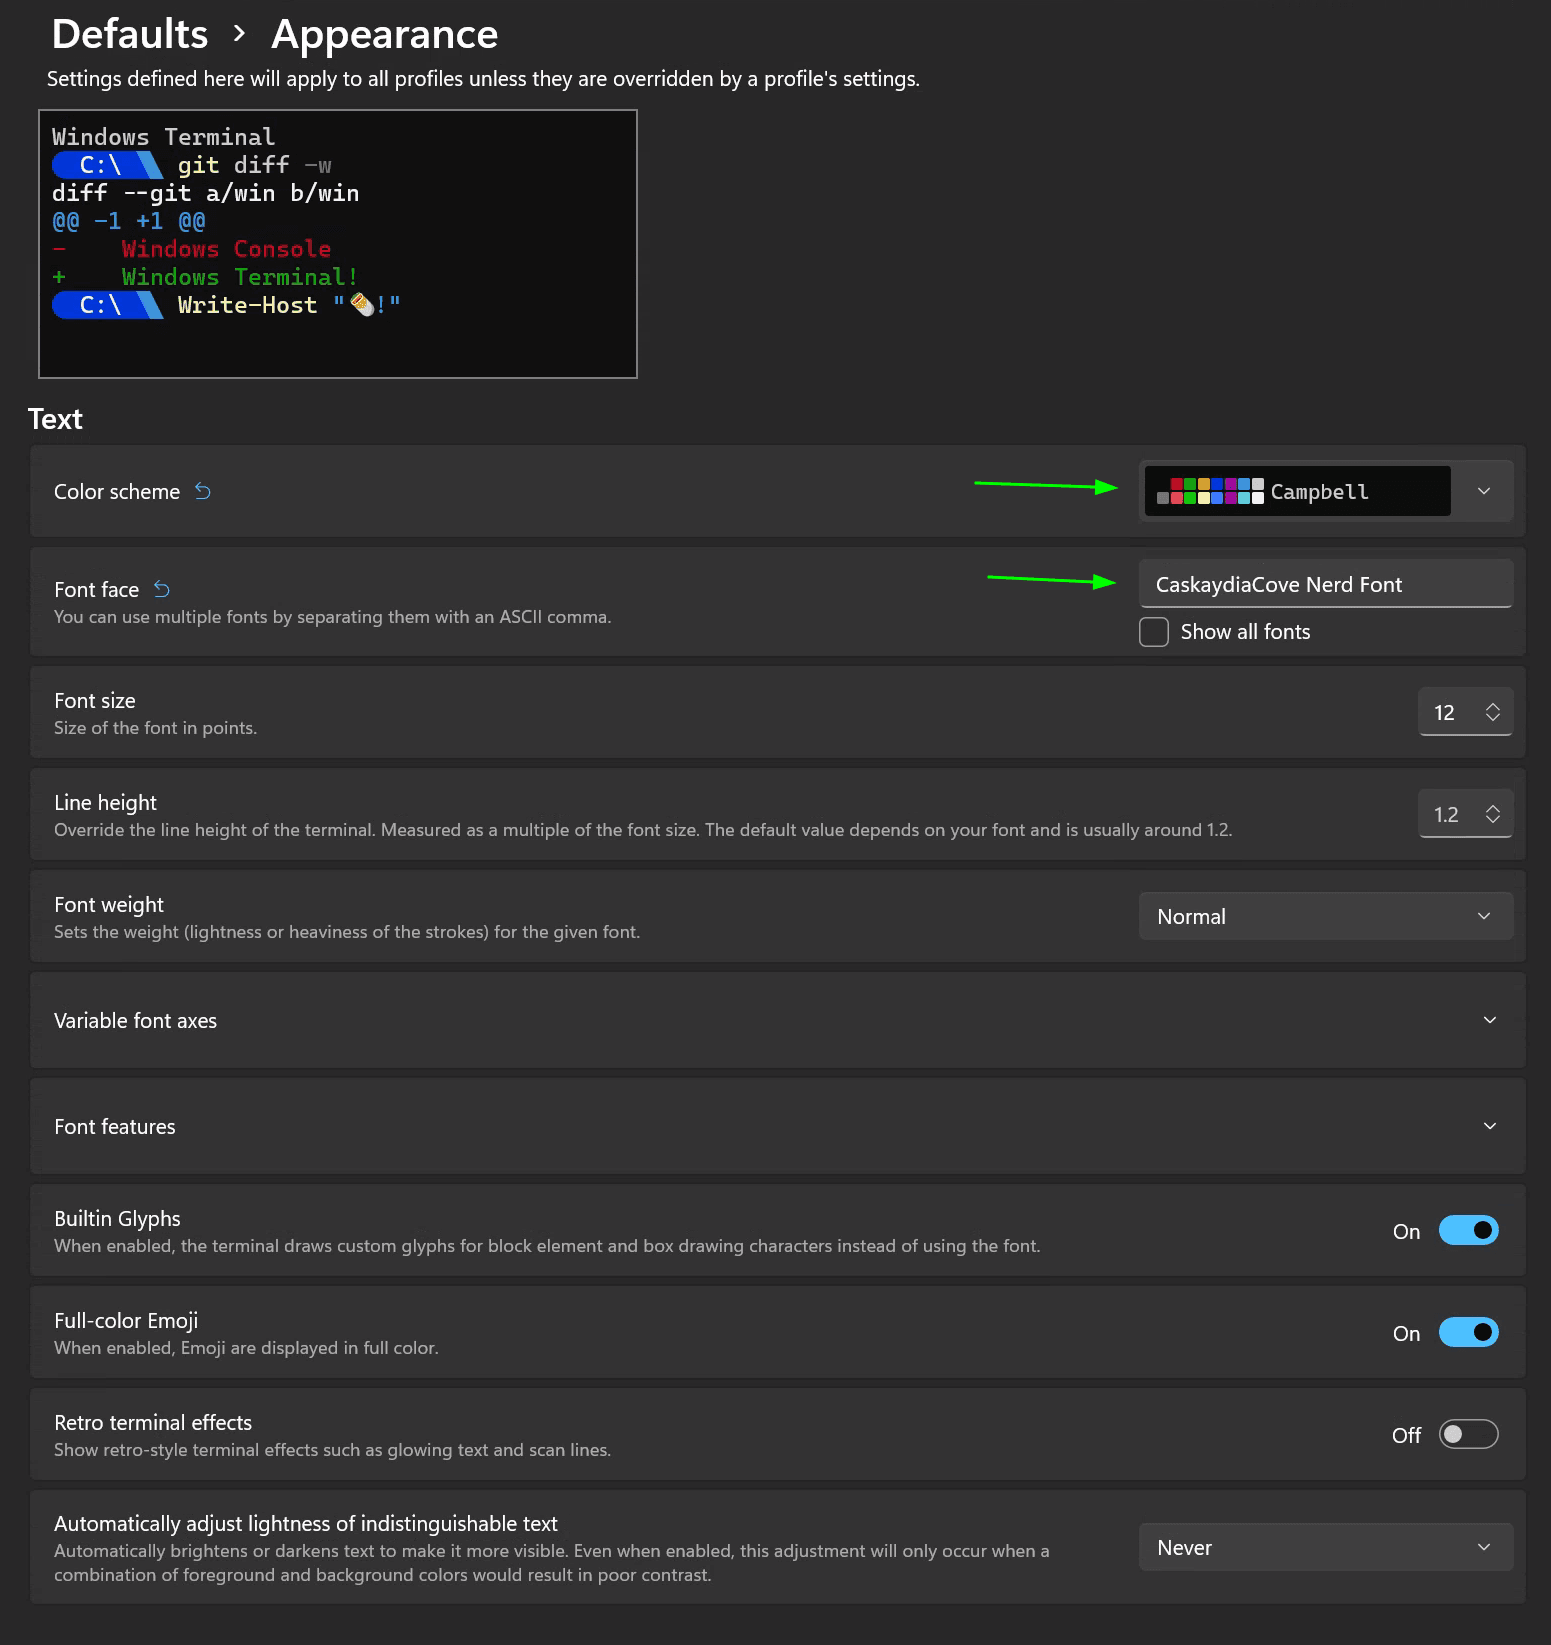
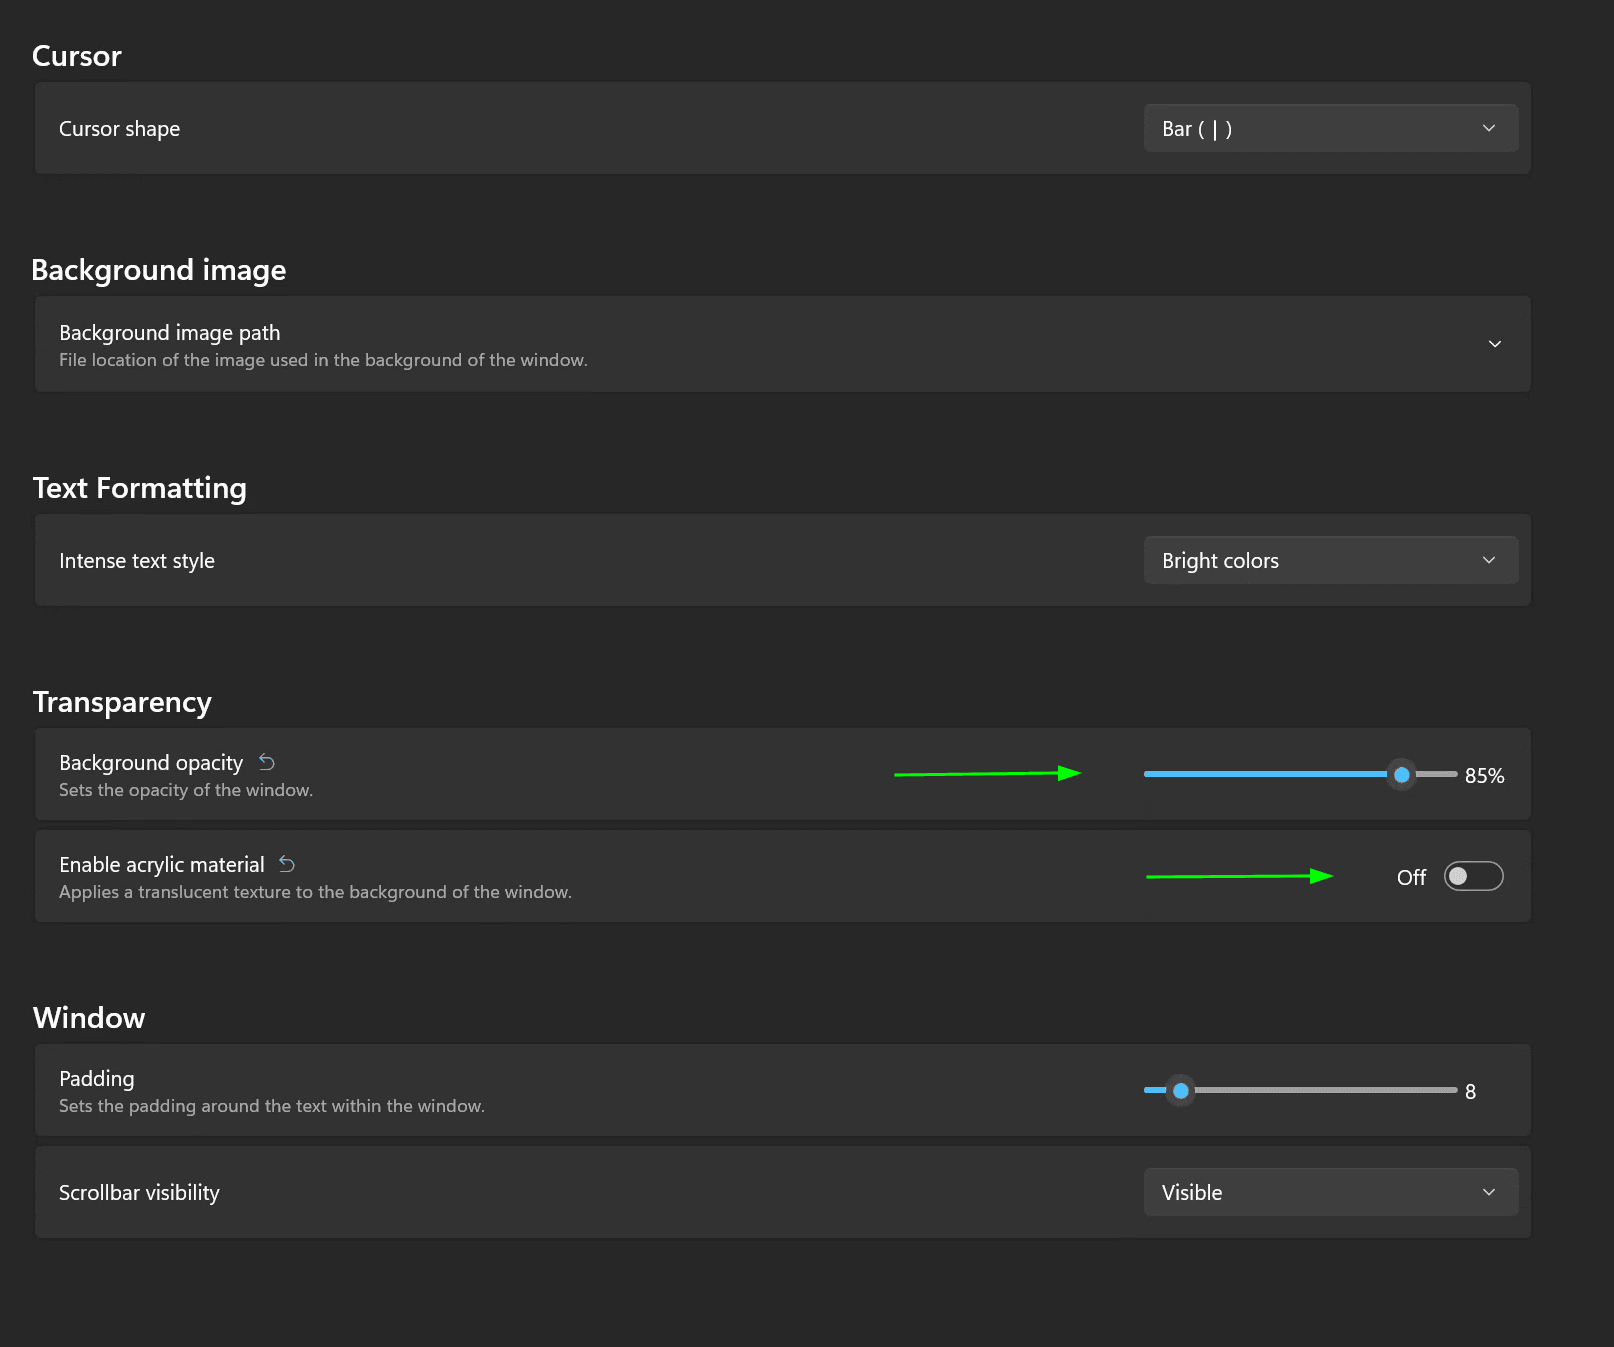
- Step through the following pages, and set all that are marked with Green Arrows:
- Set PowerShell Core to be the default profile and set Terminal to be the default terminal application.
- Set the option to automatically copy selections to clipboard.
- Set use acrylic in the tab row.
- There are no changes in the rendering settings.
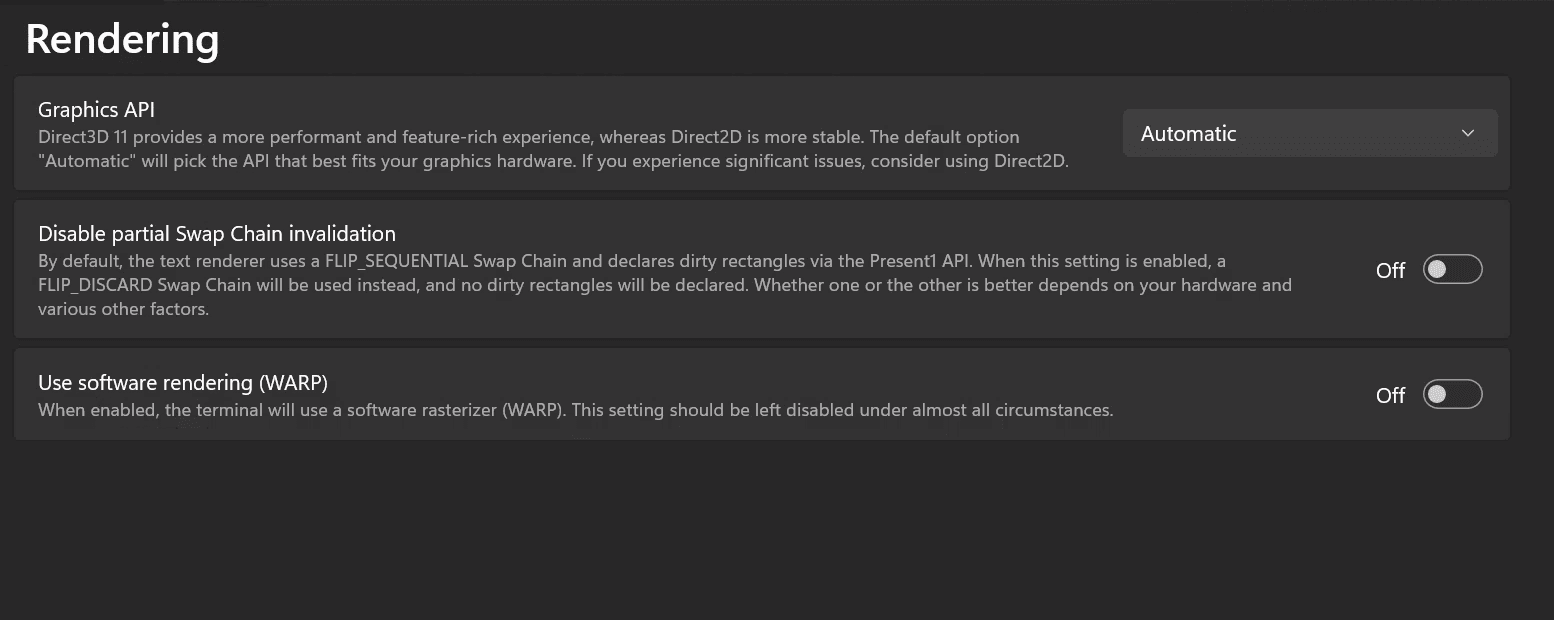
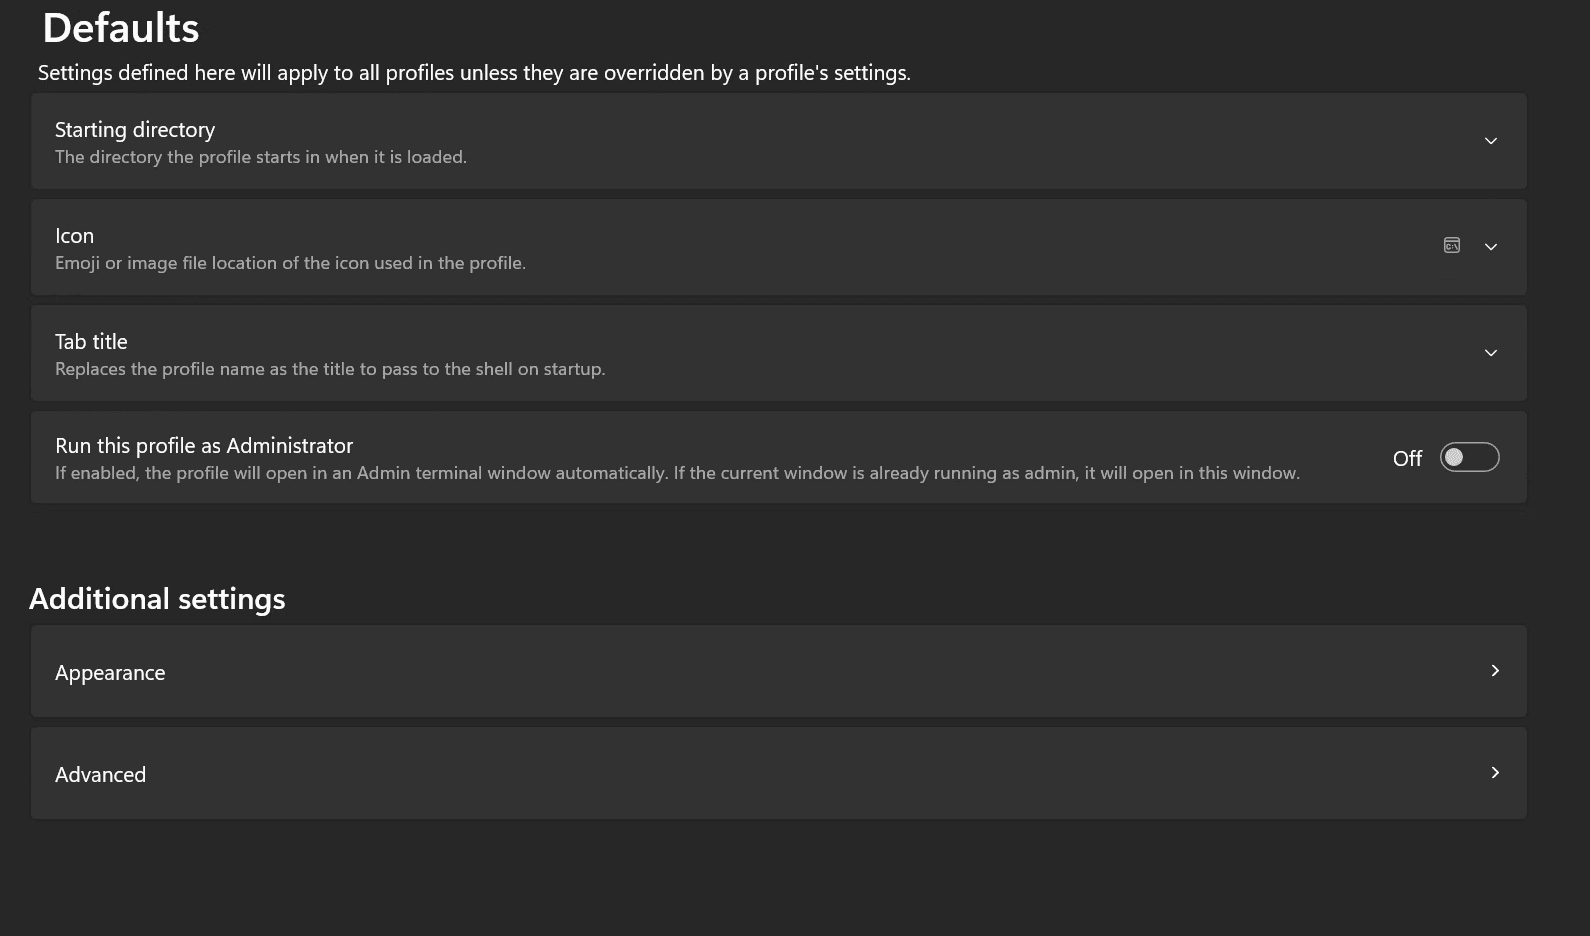
- Step through the profile defaults and set all that are marked with Green Arrows:
- There are no changes in the Defaults profile settings..
- Set the Color Scheme to “Campbell” and the Font face to “CaskaydiaCove Nerd Font”.
- Under Transparency settings set the slider to 85% and make sure the "Enable acrylic material" is Off
- Relocate Powershell Core in Launch List
- Open Terminal, and select settings from the carrot menu then Open the JSON file.
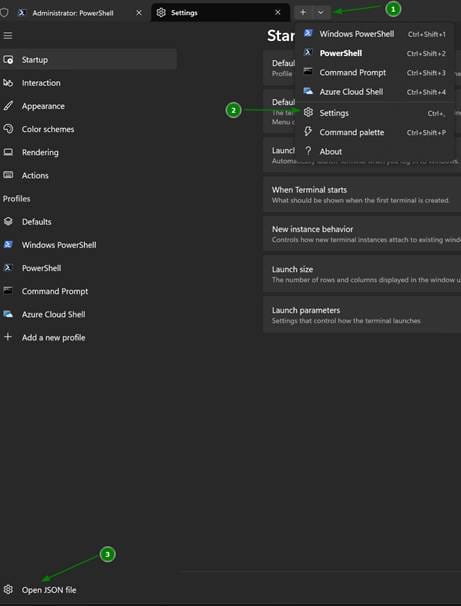
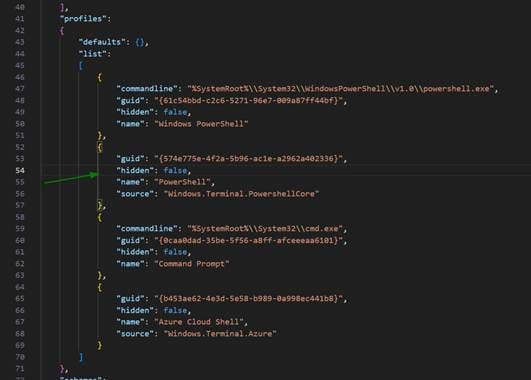
Move Powershell Core into the 2nd position, by cutting and pasting. Rename to PowerShell Core
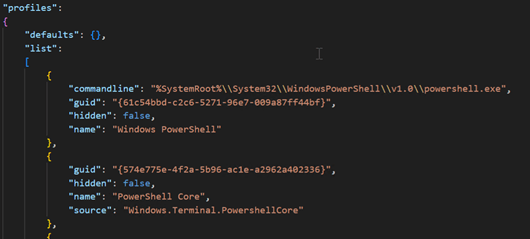
The Basic Configuration of Terminal is now complete!