Brave Setup
Every time I spin up a new machine, rebuild a VM, or reinstall Brave because I broke something else entirely, I end up doing the same dance: open Settings, hunt down Leo AI, turn it off. Hunt down the Wallet, turn it off. Rewards, VPN, News, Talk - off, off, off, off. Then flip the appearance toggles I actually want back on. Then close the browser, reopen it, and discover half of it didn't stick because Brave decided I "changed something from outside" and quietly reverted it.
I do this often enough that I finally wrote it down as code instead of muscle memory. The result is brave-setup on my GitHub - two small scripts, one for Windows and one for macOS, that configure Brave exactly the way I like it in about four seconds instead of four minutes of clicking. This page is the setup guide, in case "just run my random script off the internet" feels like a leap of faith (it should - more on that below).
What it actually turns off (and on)
Brave is great, but it ships with a lot of opinions I don't share. The script deals with them two different ways, and the difference matters:
The stuff that gets fully removed
Leo AI, the Web3 Wallet, Rewards, VPN upsells, the News feed, Talk, and the promotional "set up Sync" nag tabs all get switched off through Brave's official enterprise policy mechanism - the same registry keys (Windows) and managed-preferences plist (macOS) that IT departments use to lock down Chrome and Brave fleet-wide. It's the legitimate, sanctioned way to do this, and it survives Brave updates instead of getting silently undone the next time the browser patches itself.
Notably not on this list: Sync itself. I'm killing the nag, not the feature.
The stuff that gets toggled on
Widevine DRM (so Netflix and friends actually play), the wide address bar, always showing full URLs, rounded corners, search suggestions, and the Web Discovery Project don't have an enterprise policy at all - they're just plain preferences. So instead of enterprise-locking settings that have no business being locked, the script edits Brave's own JSON preference files directly. You can still go change any of these by hand afterward through Settings, same as always.
Three things I couldn't script (and why)
I wanted to automate everything. Brave said no, for reasons that are honestly kind of fascinating:
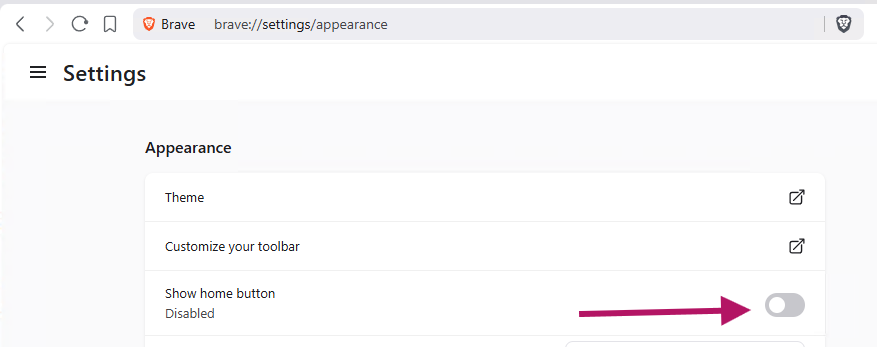
- Show home button - this is one of a handful of Chromium settings considered historically "hijacking-prone," so it's protected by an HMAC computed from a per-install seed baked into the binary. Edit the value directly without recomputing that HMAC, and Brave detects it as "changed from outside" and silently reverts it on next launch, sometimes with a little passive-aggressive notice. I am not reverse-engineering Brave's tamper-detection just to skip one click.
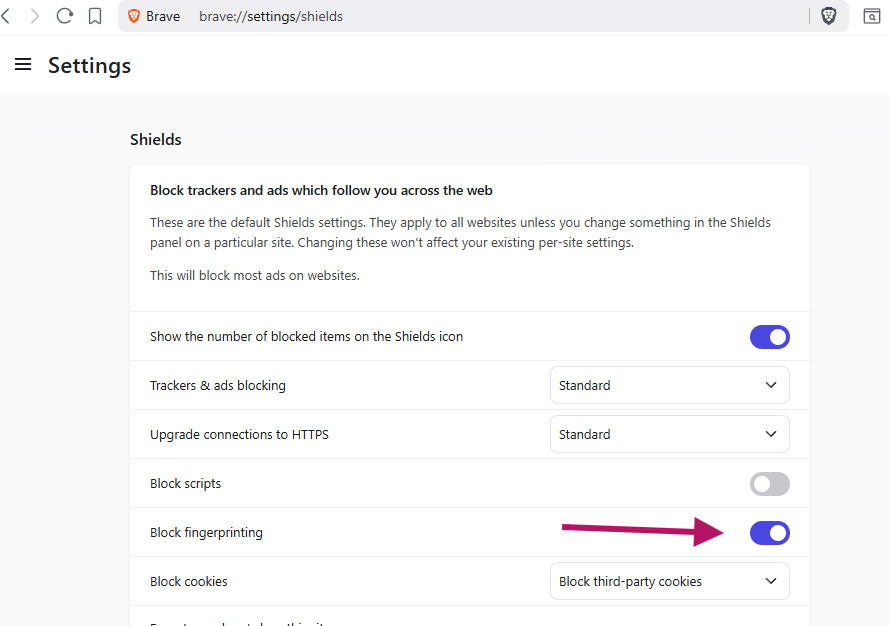
- Block fingerprinting (Shields) - this toggle calls a live backend function instead of writing to a stored preference, so there's no key to set. It's not a setting so much as a doorbell.
- Default search engine = Brave - resolved at runtime by list index against a dynamically built engine list, not a stable ID. Even the policy route for this is documented by Brave's own community as unreliable. Some things just want to be clicked.
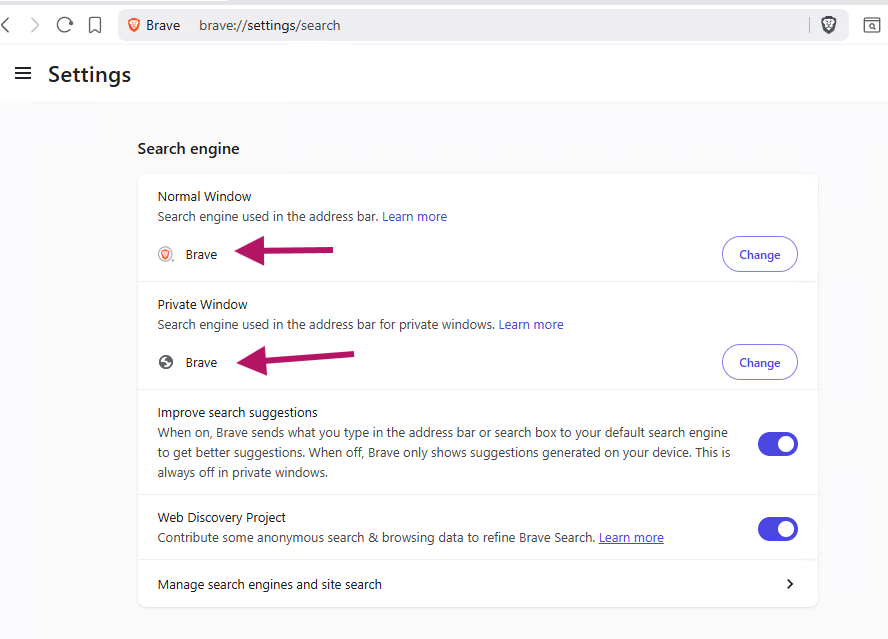
All three take about ten seconds combined in brave://settings/appearance, brave://settings/shields, and brave://settings/search. The script will remind you.
Step zero: actually install Brave first
This part trips people up, so it gets its own heading instead of a parenthetical you'll skim past: download Brave, install it, and open it at least once before running either script. Brave doesn't write its preference files (Local State, the profile Preferences file) to disk until you've launched it and it's finished setting up your initial profile. Run the script before that happens, and there's nothing on disk yet for it to edit - the script will notice, print a link to brave.com/download, and politely stop rather than pretend it did something.
So the actual order is: install Brave → open it once → let it sit on the new-profile screen for a second → close it (or not, the setup script will close it for you) → then run the script below.
Windows
Read the script before you run it - that's good practice for piping anything into a shell, not just mine. The full source is right here: Set-BraveConfig.ps1.
Once you're satisfied it's not doing anything sneaky, open PowerShell and run:
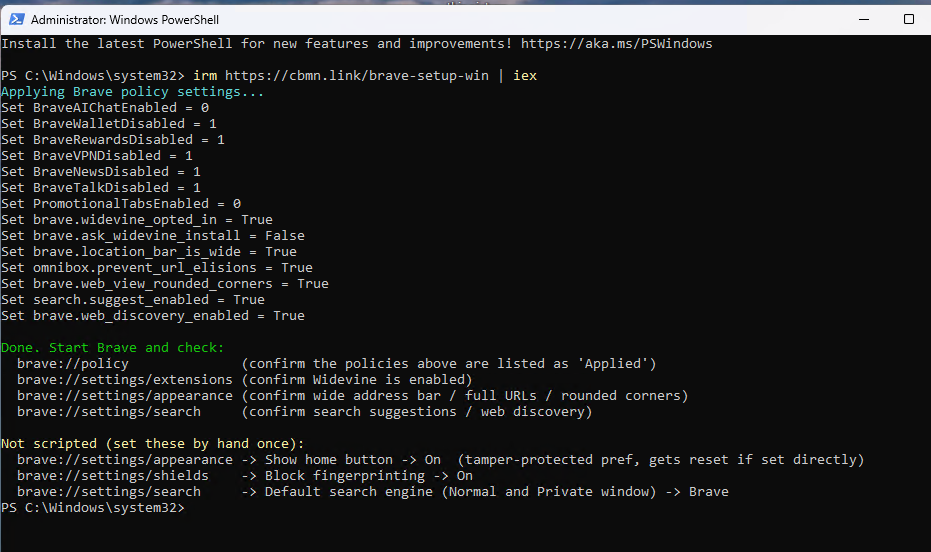
irm https://cbmn.link/brave-setup-win | iex
It'll relaunch itself elevated (you'll get a UAC prompt - writing the policy keys needs admin rights) and apply everything above. If Brave isn't installed yet, it just prints a link to brave.com/download and stops, since none of this works until Brave has been installed and launched at least once.
Want to see what it would change before committing to anything?
& ([scriptblock]::Create((irm https://cbmn.link/brave-setup-win))) -DryRunChanged your mind and want the policy/preference changes reverted, without uninstalling Brave or touching your profile data?
& ([scriptblock]::Create((irm https://cbmn.link/brave-setup-win))) -Uninstall
Full uninstall (destructive - reads carefully)
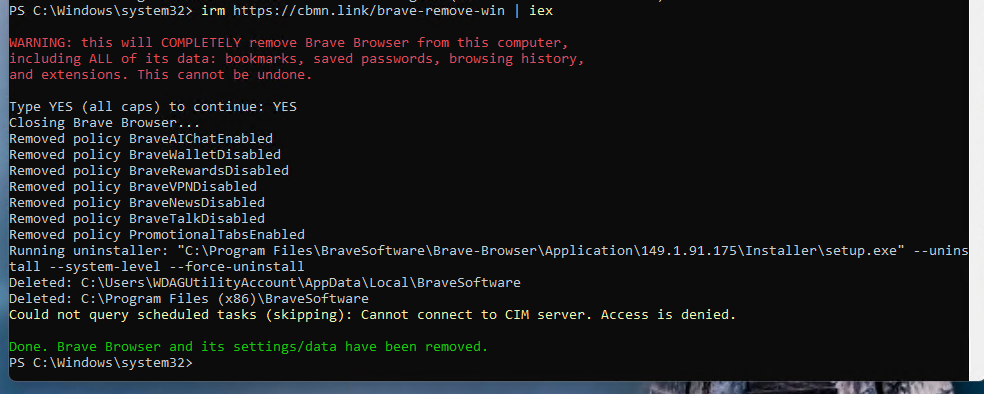
This is a separate script, not a flag, because it does something a lot more permanent: it removes Brave entirely, plus all of its data - bookmarks, saved passwords, browsing history, extensions, the works. It tries winget first, then falls back to Brave's own uninstaller via the registry for installs winget doesn't know about. You'll be asked to type YES before anything happens.
irm https://cbmn.link/brave-remove-win | iexIf you just want to preview what would be deleted, the same -DryRun trick from above works here too.
macOS
Same deal - read it first: set-brave-config.sh.
curl -fsSL https://cbmn.link/brave-setup-mac | sudo bashsudo is needed up front this time (no relaunch trick on macOS) since writing the managed-preferences plist requires it. Same install check applies - no Brave yet means a link to brave.com/download and a graceful stop.
Dry run:
curl -fsSL https://cbmn.link/brave-setup-mac | sudo bash -s -- --dry-runRevert settings only, keep Brave installed:
curl -fsSL https://cbmn.link/brave-setup-mac | sudo bash -s -- --uninstallFull uninstall (also destructive, also reads carefully)
Uses brew uninstall --cask brave-browser --zap if you installed it via Homebrew, otherwise deletes /Applications/Brave Browser.app directly, plus all the leftover data in ~/Library/Application Support and ~/Library/Caches. Same YES confirmation gate as the Windows version.
curl -fsSL https://cbmn.link/brave-remove-mac | sudo bashConfirming it worked
After either platform's setup script finishes, fully quit and relaunch Brave, then check:
brave://policy- every policy listed above should show as "Applied"brave://settings/extensions- Widevine should be enabledbrave://settings/appearance- wide address bar, full URLs, rounded cornersbrave://settings/search- search suggestions and Web Discovery
And then go flip the three settings the script couldn't touch, and you're done. No more clicking through the same seven menus every time you set up a machine - now it's one command and a coffee break that's slightly too short to be worth starting.
Full source, the policy/preference reference doc, and both uninstall scripts are all in the brave-setup repo if you want to see exactly what's getting written before you trust a stranger's curl command with your browser.